Welcome to my Behringer X32 FX Series tutorials. Today we are going to be looking at the Wave Designer. Be sure to watch my YouTube video that I released on the Wave Designer as it goes along with this blog post!
The Wave Designer is a Behringer X32 Effect that is modeled after the SPL Transient Designer. The original piece of gear is RAVED about by many artists ranging over the entire gamut of music genres. One of the popular features of this is that it only has two main controls.
The Wave Designer allows you to increase or decrease the attack and/or sustain of signals. It does this a bit differently than a compressor but in a very similar way. The Wave Designer rather than focus on a threshold uses the shape of the waveform (envelope) to make its adjustments on the signal.

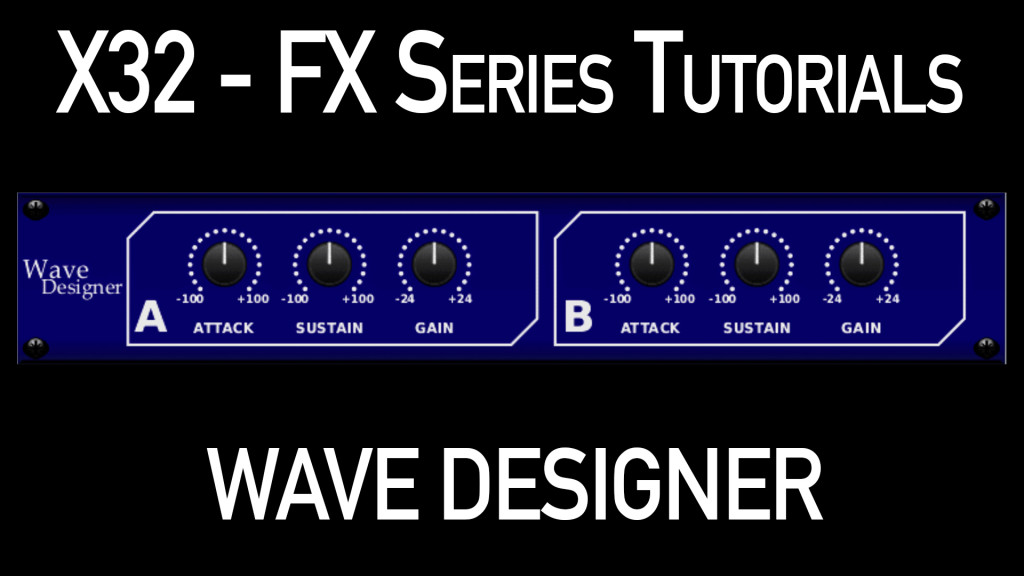
The only layer of controls gives us our independent control for channel A & B for:
- Attack adjustment from -100% to +100% in 2% increments.
- Sustain adjustment from -100% to +100% in 2% increments.
- Gain adjustment from -24dB to +24dB in 0.5dB increments.
When inserted, this effect will add a 1.42ms delay to the channel it is inserted on. The effect does not apply any EQ curve on insert.
Wave Designer Attack
The attack control allows us to increase or decrease the initial transient of the signal. Below are examples of the waveform of a Kick Drum and Snare Drum where the attack was increased to 100% and the gain was dropped significantly to reduce levels as to not clip the waveform. We can see a decrease in amplitude on the decay, sustain and release of the waveform because of the reduction of gain.


Wave Designer Sustain
The sustain control allows us to increase or decrease the sustain. Below are examples of the waveform of a Kick Drum and Snare Drum where the sustain was increased to 40%. We can see an increase in amplitude on the sustain, however, the attack, decay, and release of the waveform stay fairly consistent to the original raw track.


Wave Designer Attack & Sustain
The beauty of these two controls of the Attack and Sustain is that they are independent of each other. You can increase and/or decrease at the same time as the two are completely separate circuits. Below I have increased both the attack and the sustain a little on the Kick Drum and Snare Drum.


Application of the Wave Designer
In playing around with the Wave Designer, my favorite uses for the effect is to insert on the Kick, Snare and Bass Guitar, however, there are many other uses for this effect.
Kick Drum:
- Increase Attack to give extra punch to a kick drum.
- Decrease Sustain to dampen a loose sounding kick.
- Increase Sustain to give a longer kick drum note.
Snare Drum
- Decrease Attack to give the snare less punch and more snare sound
- Increase Sustain to give more snare sound
- Decrease Sustain to dampen the snare
- Increase Attack to give a more punchy snare
Bass Guitar
- I love Increasing Attack while using this on the Bass Guitar. It will help transform a boring sounding bass to give lots more punch and string sound.
Mix Presence
- One of the last things I will mention is that you can move a signal’s presence in the mix forward or backward using the Wave Designer. Decrease Attack and Increase Sustain to move a signal that has too much presence in the mix, back to a more manageable level.
Want to see more Effects Tutorials?
To view more of my Behringer X32 Effects Tutorials, click here: dBB Audio FX Series