
In my previous post, I showed you how to set up a vocal reverb on the Behringer WING using the mix bus method. That approach is simple and works great for most situations. But what if you want more control?
This post takes it one step further by routing your reverb through an effect return channel on your Behringer WING. This gives you the ability to gate, EQ, and compress the reverb, plus send it pre-fader to monitor mixes so your vocalists get a consistent reverb level in their ears regardless of what you’re doing at front of house.
Watch the full walkthrough in my WING Effect Return setup video.
Why Use a WING Effect Return Channel?
With the standard mix bus method, your reverb bus feeds your mains directly. That works, but it has limitations:
- Bus-to-bus sends on the Behringer WING are post-fader only, so if you turn down your VOX Verb bus fader, it also turns down in any monitor mixes you’ve sent it to
- You can’t easily gate, EQ, or compress the reverb return independently
By routing the reverb output to a channel instead of directly to the mains, you get:
- Pre-fader sends to monitors: Your vocalists get a consistent reverb level in their ears even when you adjust the reverb in the room
- Processing on the return: Apply EQ and compression to shape the reverb sound after it’s been processed
- EQ on the send: Use the VOX Verb bus EQ to shape what feeds the reverb (more on this below)
Step 1: Set Up the VOX Verb Bus with Insert 2
Start by setting up your VOX Verb bus the same way as the basic method, but with one key difference: use Insert 2 (post-fader) instead of Insert 1.
Select your mix bus (I’ll use Bus 13), name it ‘VOX Verb Send’, and go to the home screen. Navigate to Insert 2 and select an effects processor.
Remember, time-based effects like reverbs and delays are premium effects and need to be loaded into FX Racks 1-8. Select your rack, choose your reverb type, and turn it on.
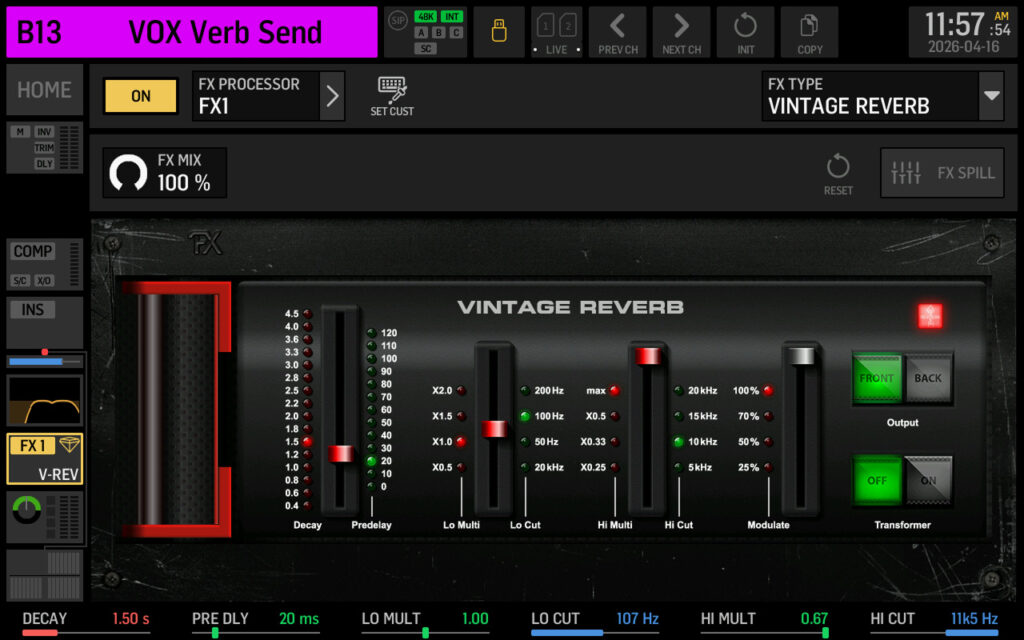
Vintage Reverb on Insert 2 (post-fader) of Mix Bus 13.
Step 2: Shape the Reverb Send with Bus EQ
Here’s the benefit of using Insert 2: because your EQ sits before the post-fader insert point, you can use the bus EQ to shape the signal feeding your reverb.
Select your VOX Verb Send bus and go to the EQ section. Press ‘SETTINGS’ in the top right, then change ‘LO BAND’ to ‘CUT’ and ‘HI BAND’ to ‘CUT’. This enables high pass and low pass filters. A common approach is to set the low cut around 120 Hz and the high cut around 10 kHz. This keeps the low end from getting muddy and tames harsh high frequencies in the reverb tail.
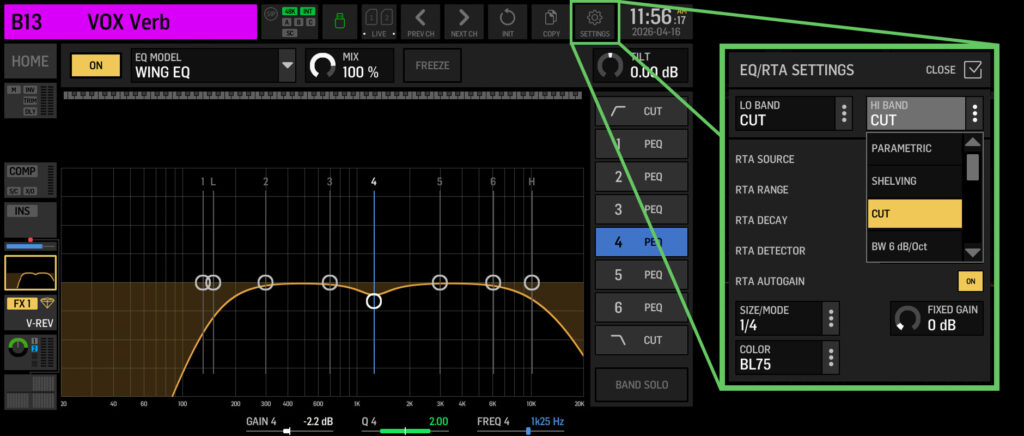
Using the VOX Verb Send bus EQ to shape what feeds the reverb.
This gives you more control than the basic low cut and high cut parameters built into the effect itself.
Step 3: Send Your Vocals to the VOX Verb Send Bus
Route your vocal channels to the VOX Verb bus just like the basic method. Make sure your sends are set to post-fader so the reverb level follows your vocal fader.
Step 4: Create the Effect Return
Now instead of routing the VOX Verb Send bus directly to your mains, you’ll route it to a channel.
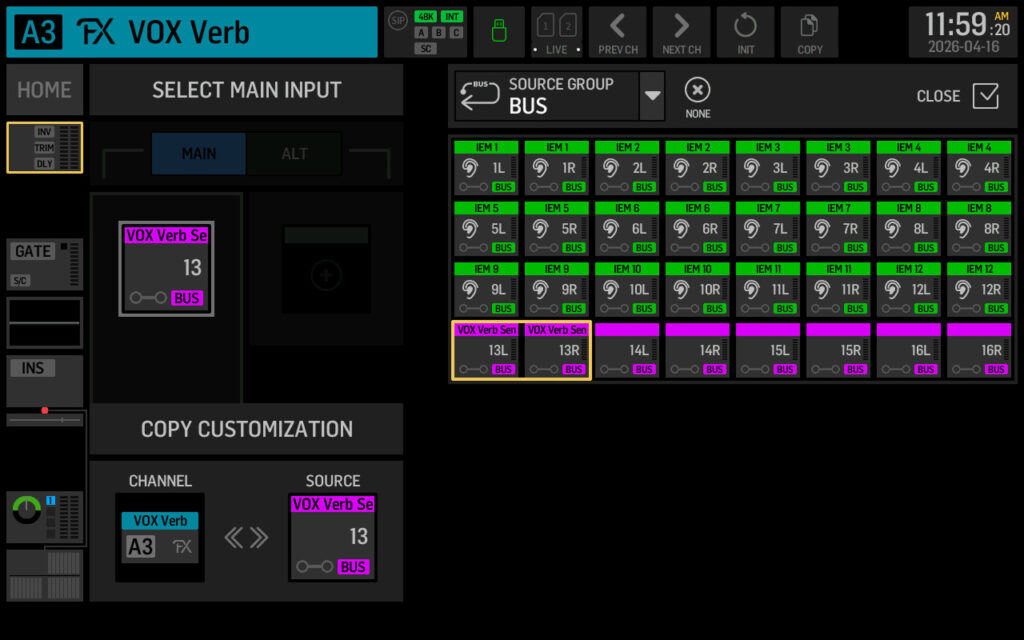
Option A: Use an Aux Channel
Aux channels are often unused in many show files, making them an easy choice for effect returns.
Select an aux channel (I’ll use Aux 3), go to the home screen, and navigate to the input source. Change the source to ‘Bus 13’ (your VOX Verb Send bus).
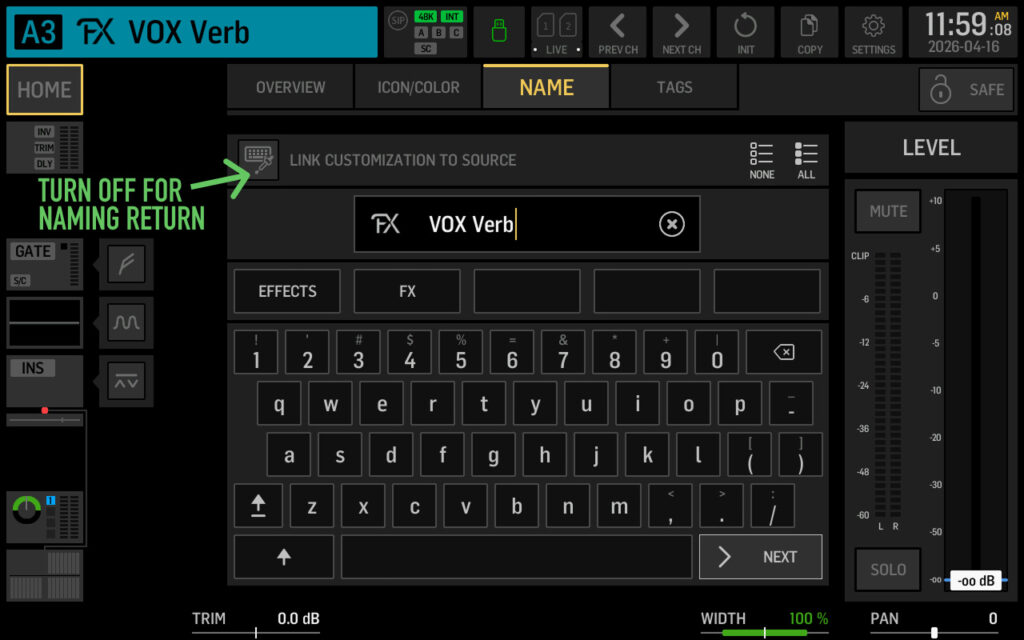
Before naming the channel, go to the ‘NAME’ section and disable ‘Link Customization to Source’. If you skip this, the channel will automatically take the same name as the bus you selected as the input source. With this disabled, you can name the return ‘VOX Verb’ to distinguish it from ‘VOX Verb Send’.
Aux 3 (VOX Verb) input source set to Bus 13 (VOX Verb Send).
Now your reverb returns on this aux channel. Turn up the fader and you’ll hear the reverb.
Option B: Use a Main Channel
Using a main input channel (like Channel 40) instead of an aux gives you more flexibility:
- Full tap point options for sends
- Access to Tap EQ for shaping the sound sent to specific buses
- Gate and dynamics processing
Select your channel, go to the input source, and set it to ‘Bus 13’. Before naming, disable ‘Link Customization to Source’ in the naming section so you can give the return a unique name like ‘VOX Verb’.
If you need the extra routing flexibility, a main channel is the better choice. If you just need a simple return with pre-fader monitor sends, an aux channel works fine.
Step 5: Route the Return and Send to Monitors
With your effect return channel set up, you now route it like any other channel.
To your mains: Make sure the channel is sending to your Main PA and Stream mixes. You can set independent levels for each, just like any vocal channel.
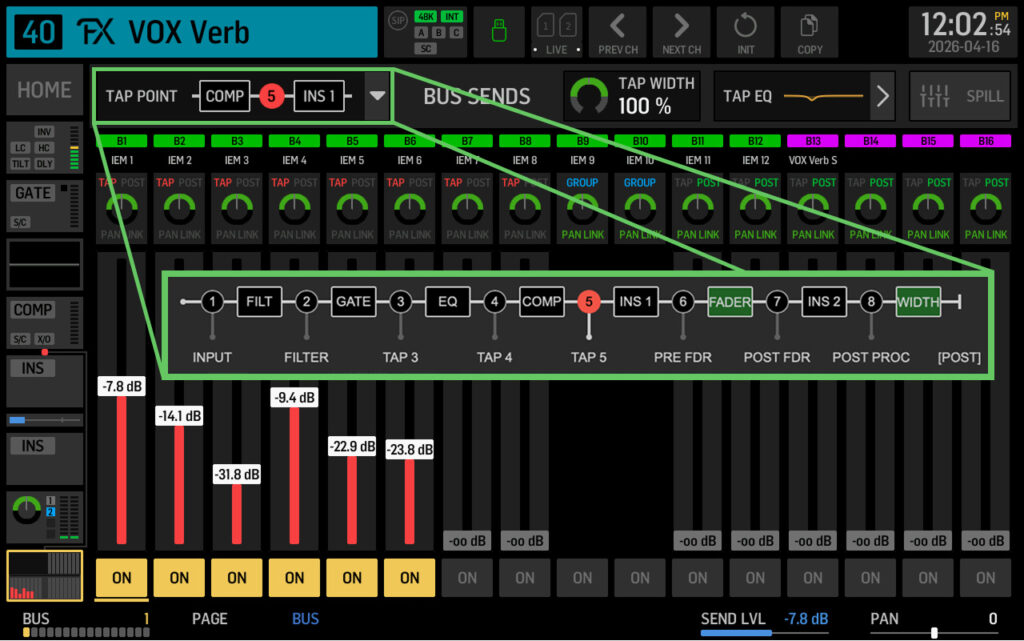
To monitors (pre-fader): This is the key benefit. Go to your effect return channel’s bus sends, turn on the send to your monitor bus, and set the tap point to pre-fader.
Now when you adjust the effect return fader for your room mix, it won’t change the reverb level in your musicians’ ears. They get a consistent reverb sound regardless of what you’re doing at front of house.
Processing the Effect Return
Since your reverb is now returning on a channel, you can process it further:
- EQ: Cut problem frequencies in the reverb tail, or shape the tone to sit better in the mix
- Compression: Tame peaks in the reverb or add sustain
- Gate: (On main channels) Clean up the reverb tail if needed
This level of control isn’t possible when the reverb bus feeds the mains directly.
YouTube Video
Watch the full walkthrough in my WING Effect Return setup video.
Effects Preset Pack
If you want a head start on dialing in your effects, I sell an effects preset pack with my favorite sounds for all the built-in effects on the WING. Check it out here.